The clock is ticking and your project has to get out – fast! Your client keeps asking “when will this be done” and you’re still hours away from finalizing for delivery. This is the scenario video editors face on a daily basis.
To give you a leg up, we’ve assembled the following quick tips for video editing in Final Cut Pro X…
Tip #1: Know Your Shortcuts
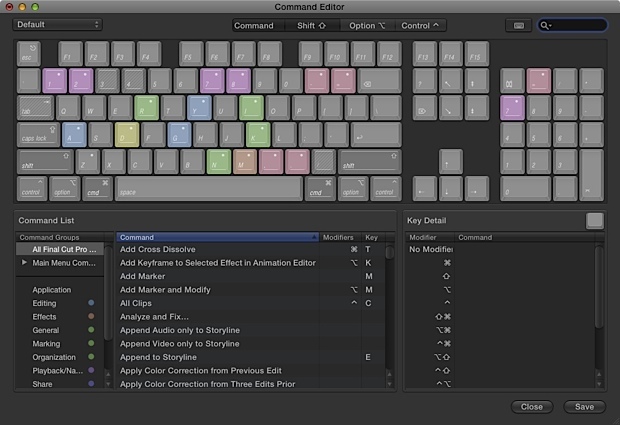
Using shortcuts WILL greatly increase your effectiveness when editing. For pros, there’s no other way…shortcuts are a must.
To access the shortcut editor in FCPX head over to Final Cut Pro > Commands > Customize. In this menu you can modify the shortcuts and tweak to fit your needs/workflow. If you’re coming from another video editing app like Avid or Premiere Pro you can mirror the shortcuts from these applications. You can also head over to KBcovers.com and pick up a keyboard overlay that will help as well.
Tip #2: Check Output Settings Early
You don’t want something to go wrong just moments before the edit is due, so once you have all of your footage imported and some clips dropped into your timeline run through and do a quick export. This quick export will help ensure that your settings are correct and match what the client wants. Then, when you’re ready to do a full export you can feel confident that your settings are correct.
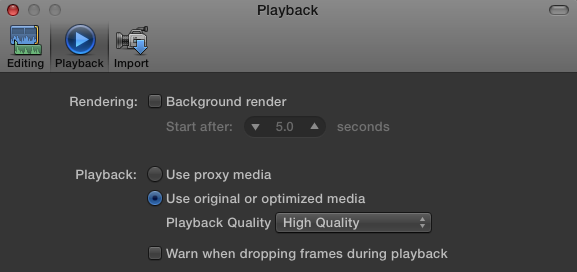
Tip #3: Turn Background Rendering “On”
Final Cut Pro X has the ability to render in the background while you work. To access these settings go to Final Cut Pro > Preferences > Playback.
Tip #4: Dynamic Trimming
Dynamic trimming is the process of trimming NOT in the timeline, but in the edit window. Essentially you complete your trimming with the keyboard while the edit is playing. This is fairly simple to do, but you’ll want to have some important key combinations down before you attempt this. Pro video editor Chadwick Shoults demonstrates this technique in the following video:
Here is Chadwick’s list of Shortcuts:
shift + x = extend edit (edit during playback, dynamic)
; and ‘ = go to prev and next edit
[ and ] and \ = selects the type of trim operation (single roller, dual roller)
, and . = nudging 1 frame (use shift to x10 the change)
option and [ = top edit
option and ] = tail edit
command + b = add edit (cut)
t = only really used for slip and slide (not changing durations)
x = selects range between 2 cuts
Tip #5: Turn Off Waveforms
Often video editors will use audio waveforms for editing, as it makes it easier to changes in music or tempo. However, waveforms may also slow down FCPX, especially if you’re working with a large set of media files. You can turn waveforms off in the timeline, browser and inspector so it doesn’t hinder speed. Note: video editors running a computer with a lot of RAM shouldn’t feel the effects of the waveforms.
To access the waveforms settings go to View > Hide Waveforms. Of course once you finish your edit you’ll want to make sure to turn these back on so you can check your audio levels before exporting.
Tip #6: Adjustment Layers
If you’re a seasoned pro in Photoshop, After Effects or Motion you’ll know that adjustment layers are a way to take your edits to another level. When using Motion in conjunction with FCPX you can make your own adjustment layers, but there are also tons of places online to find professional adjustment layers. The greatest thing about adjustment layers is that once in place all changes made happen to that layer…not your raw footage. Check out this tutorial from Ripple Training on how to effectively use adjustment layers in FCPX, samples below.

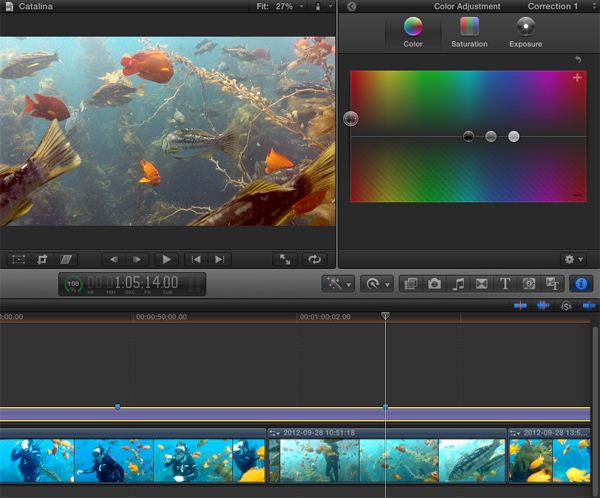
Above images from Ripple Training
Tip #7: Remember to use Snapshot
If you’re editing on FCPX and haven’t used Snapshot you should begin doing so now! Snapshot is a great feature in FCPX that allows you to create a duplicate of your project (it won’t change if you change the master project). Essentially what Snapshot offers is a way to create drafts of your project as you go through your edit. Here is a great introduction and tutorial from Larry Jordan on how to do just that:
Tip #8: Use Seamless Transitions
If you're editing on FCPX and want to push your postproduction quality and save a lot of time - you can use ready made transitions from FCPX Package!
It will help you save a lot of time and increase your editing quality.
More information about items you can check here https://pixleaks.com/final-cut-transitions
